
Centerlock vs. 6 Bolt Disk Brakes
For every biking enthusiast, it is important to know that the structure of the braking system determines the amount of power produced when braking. You must consider what attaches the brake rotor to the tire’s hub. Centerlock and 6 bolt disk brakes are good examples of equipment you can use in carrying out such activities.
Centerlock disk brakes use rotors that move at high speeds and can stop when you apply a force to the braking handle. You can install them within a short while, even if it is the first time you will be doing so. They are less bulky and you will prefer them if you are a constant cyclist. You need a special key to connect it to the hub and the bike’s brakes to enable it to function.
6 bolt disk brakes use rotors to enhance movement but when they attach to the hub, it will take you less time to stop the bike tire. This is when compared to the centerlock type that is more efficient in speed. It uses a complex method of installation that will make you take a lot of time handling it. You will fall in love with it if you like riding for short distances.
Conversion of a 6 bolt to a centerlock disk brake
Disk brakes create friction between a compressed pair of pads and a rotor using calipers. This action enables the shaft to stop rotating, bringing a vehicle or bicycle to a stop. This process occurs in a series from slowing down the motion of an axle until it reaches a point where it cannot move.
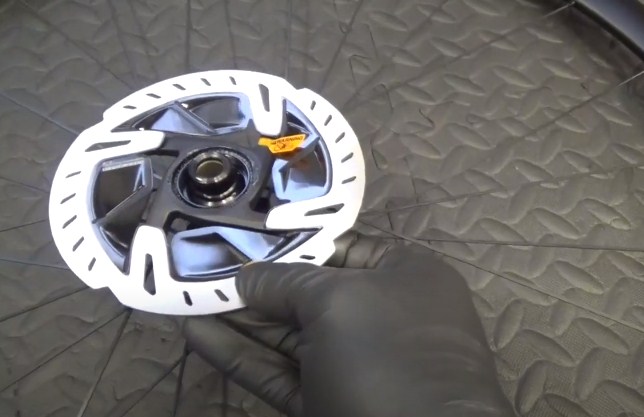
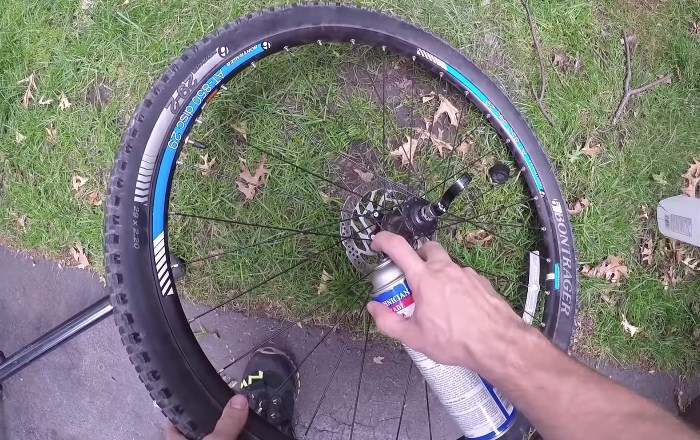
Installing the centerlock disk brake is a simple process. You will not have to try setting up 6 torques on the surface of the rotor. This is because it has its lock at the center point surrounded by metal made from steel. It has an inner ring that prevents it from bending. You can also replace the rotor when need be because it is easily removable.
The 6 bolt disk brake has a pair of rotors that prevent overheating and warping of your bike. You need to tighten the bolts to avoid uneven torque that leads to unequal brakes. The use of 6 bolts enables it to have many features that enhance how you brake.
A 6 bolt rotor is compatible with a centerlock disk brake once you combine their features. It can slide to the hubs at the tires, creating an interface for mounting.
This process needs you to secure it using quality equipment. Ensure you use a six-bolt washer, a circle clip, and a lockring to tighten it. This will keep it locked for long and you will not have the feel of using a ring with six bolts.
How to fit centerlock and Shimano disk brakes
Fitting disk rotors in the right manner helps in preventing the malfunctioning of your bike’s brakes. You need to carry this out in order and with precision to avoid getting in danger. Here are ways to help you fit and remove disk rotors.
Begin by checking the condition of other components affecting the functioning of your bike’s brake. Look out for the seating of the wheels, the rotor, and the barrel change, and tighten the cable. When all is clear and in place, you can start the process of fitting.
You start by making the caliper mounting bolts loose to allow it to float. Adjust the outer pad counterclockwise and back to a single revolution to give a chance for future repairs. Then begin turning the pad adjuster within clockwise to enable the pads to lock against the rotors.
Continue to snug the bolts meant for caliper mounting against the rotor to ensure it aligns with the caliper body. Do not tighten it too much but wait till the pad gets aligned. Complete by loosening the pad adjusters on the inside and outside in even proportions.
You should always aim at ensuring the caliper is parallel to the rotor and has equal openings on either side. Check for adequate lever grip by pulling, then releasing the brake lever a few times. A slow and adequate feel will confirm that everything is fine and you can stop the bike. Never forget to tighten the pinch and mounting bolts before trying out your ride.
Conclusion
The only difference between a centerlock and a 6 bolt disk brake is the method used to fit the rotors. They generally function in the same way, having to provide support to braking your bike. It is also easy for you to recreate the 6 block disk brake to a centerlock by following a set of guidelines. Ensure you pick on either of these sets, depending on the activities done with your bike.

Can You Use a Presta Tube on a Schrader Rim?
Bicycle tires and valves play a significant part in ensuring you have a successful ride. But when encountered by an emergency, you can mismatch bicycle tubes and valves. Bicycle tires have different valves which include the Schrader and Presta valves.
Presta tubes are sometimes used in Schrader rims for such instances. Here’s how the two can be compatible to ensure you keep riding that bicycle.
What are Presta tubes and Schrader rims?
The Schrader valve is like those used in car tires and expansive bicycle models. They have a wider diameter and you need to wrap them in rubber before attaching them to wheels. It has a threadlike outer wall to accommodate a pump head or a cap. A pin located at the center that has a spring-loaded check valve controls the flow of air.
The Presta tubes are slender and used by inexpensive bicycle brands. Their width is half that of Schrader rims and it’s made from metal. A few of them have threads towards the bottom while the rest have tapering towards the top. This ensures the easy opening of the textured nut at the top by unscrewing.
It seals when the pressure in the tube and tire balances. They have a removable core even for the tubeless bikes.
Can you use a Presta tube in a Schrader rim?
You can use a Presta tube in a Schrader rim when encountered by an emergency fixation. A Presta tube can move in the wider Schrader rims to reach the bottom. The threads at the bottom speed up its move to the base of the valve. Ensure that you use a valve nut to secure the tube to the rim.
Ensure that the rims of the Schrader are wider than the Presta tube for the valve hole to widen. Take note that when you try this out, ensure your bicycle tires sit at low pressure. To ensure this get a valve adapter made from rubber or metal meant to reduce the size of the valve hole.
But, this isn’t advisable since the tubes and tires move on the rim. They are prone to get pinched between the tire and rims. But having a smaller tube will be compatible with a larger valve.
How do I use a Presta tube in a Schrader rim?
It’s an essential skill for every cyclist to know how to pump their bicycle. They need to know the type of pumps, the pressure to use, and the type of valves they are using. In a case where you use a Presta tube in a Schrader rim, you need to take precautions. As a cyclist, it’s amazing to have your tires gripped to the ground when pumping it to avoid punctures.
Use a nut valve to convert the rotating motion to a downward movement needed to screw in the Presta tube. This ensures the security of the tube to the Schrader rim. It also helps in avoiding the loss of inner pressure to the surrounding. Don’t worry when you own a tubeless tire because it uses a special rim and tire that seals air inside.
Always ensure to pump in the accurate pressure meant for your bicycle tires. Do this before attaching the different tubes and rim.
What are the consequences of using Presta tubes in Schrader rims?
Schrader rims are like Presta tubes in having an equal circumference at the top and bottom. You need to be keen when unscrewing the stem nut to prevent the removal of the entire core in the system. It ensures air isn’t let out of the tire.
They have a few differences which are due to their usage in different bicycle types. The application of pressure in the inner pin allows airflow in one direction. The Presta tube lacks a check valve and depends on the pressure difference applied to the tube and tire.
Conclusion
Every bike rider is prone to get caught up in an entanglement where they have to use dissimilar tubes and rims. In this situation, you need to be careful about how you install the Presta tubes in Schrader rims. You also have to be knowledgeable enough to know the terrains in which you’ll ride your bicycle. It helps you avoid accidents arising from pressure differences within the bike tire.

Should I Replace Both Bike Tires at the Same Time?
Taking proper care of your bicycle tires is key in ensuring you get a safe ride to your destination. Every cyclist yearns for their tires to be in great shape and size. There’s no better way to ensure this than checking on them. Then you can determine whether you need to replace your bicycle tires or not.
When can I replace bicycle tires?
Tire punctures are a common predicament that most bicycle owners attest to. A big cut or split comes by when you get a sudden puncture from nails or screws leading to a blowout. A small hole caused by broken glass results in a slow leak over time.
Tires wear out after prolonged use on the road. This is due to insufficient inflation pressure leading to poor bicycle performance. Its treads wear out forming flat surfaces at the centerline and it squares off to the sides.
In most instances, the rear tire wears out more than the front. This is because more weight acts on it but the lighter you are, the longer they will last.
Should I replace bicycle tires at the same time?
You need to take note that the front and rear wheels don’t wear off at the same time. This is because the rear wheel balances frictional force and the effect of wind on the front wheel. There’s no need to replace the front wheel if its treads are in good shape. This happens because the frictional resistance of the rear wheel is greater.
Physical damage on both tires will need you to replace both of them at the same time. You need to replace bicycle tires at the same time when in use for an extra five years from the manufacturing date. You can change them to ensure both tires maintain uniform treads. Always keep in mind that the rear wheel balances your weight.
Seasoned riders often replace the rear wheel most of the time while the front wheel remains. Professional cyclists often replace both wheels. This is because the tires get worn out after spending many days on the road. For them, the need to maintain grip is crucial in determining how well they’ll cycle.
How can I replace bike tires?
Begin by releasing the brake pad and loosening the axle nut for you to release the bike tire. Then go on to release the tire through prying it down then releasing it along the rim. It’s to your advantage if you own a released bike tire that gets the break-off and releases the lever on the axle.
Remove the damaged tube by taking one bead or edge off the rim for an easy release. Pull out the tube and remove the tire then place it on your neck to turn it inside out. If you aren’t certain of how to carry out the procedure, better visit your bicycle manual or get an expert.
Fix the bike tube by placing one bead on the rim leaving the other side loose to install the working tube. Always check out for any spaces between the tire and rim after fixing the tire. Do this by pushing it against the bead while you check if the space between the tire and rim is clear.
Should I get a new bike tire or a tube?
When your tire has an inner tube, you need to replace it once a cut of above 2 millimeters is in the casing. But you generally repair the tire tubes rather than the tires. The tube often wears off due to exposure to chemicals from the road grime and mud.
The tires are usually affected by wear and tear. This is due to the frictional force acting on the road and tires that make treads wear out. The tire fabric ends up getting damaged and forms a visible bulge. This might be the cause of most accidents occurring as a result of bumping while rolling.
Conclusion
Before replacing bicycle tires you need to identify the type of physical damage. It can be a small hole caused by a sharp object or the worn out treads. So ensure you do it right to avoid the occurrence of an accident. It isn’t necessary for you to replace both tires at the same time.

Can You Use WD40 on Brake Pads
It is a good idea to do regular maintenance on your bike, especially if you use it often. For instance, if cycling is a part of your daily routine. Performing maintenance allows you to detect any potential problems and as such, you would exactly know what you need to replace, repair or adjust in your bike.
Checking on your bike systematically gives you the assurance that you won’t come across any problems whenever you ride. Since the brakes of your bike are very important to ensure your safety while cycling, maintaining this part is of the essence. But when it comes to brake pads, can you use WD40? Let’s find out.
Can you use it on brake pads?
The short answer is, no. WD40 is only suitable for cleaning the internal metal parts of your bike before assembling and lubricating them. You should never use WD40 on anything other parts of your bike, especially the brake pads.
Applying any kind of oil on your bike’s brake pads or the rotors will lead to contamination. Once this happens, you need to thoroughly clean the rotors using rubbing alcohol. After that, you can either clean the contaminated brake pads too or replace them.
Is it possible to save your brake pads?
If you have already tried using WD40 on your bike’s brake pads, you may need a solution to this problem. Before throwing out your brake pads, you may want to try cleaning them and see if they still work. Here are some suggestions:
- You may try to salvage your brake pads by sanding them down a bit. This is a quick-fix solution that may or may not work.
- Another suggestion is to torch your brake pads to burn the contaminants out. If this doesn’t work, then it’s time to replace them. Don’t forget to clean your rotor thoroughly too.
- You can cry taking the brake pads off and cleaning them with alcohol. After that, you can place them in an oven or toaster oven to dry. Once the brake pads are completely dry, sand the surfaces of the pads a bit then see if they still work. If they don’t, it’s time for you to buy new brake pads.
- Finally, you can try using brake cleaner. Buy this from any auto parts shop. Spray the brake pads down completely. This may remove any trace of lubricant. Again, test your brake pads to see if they work before your next cycling trip.
Many believe that there are ways to save your brake pads because they don’t consider the brake pads damaged beyond repair when you use WD40 on them. When this happens, it just means that your brake pads get covered with a lubricant. Thus, you can solve the issue by removing the lubricant completely. Once there are no more traces of WD40, the pads should work well.
The proper way of cleaning your bike’s brake pads
Now that you know that applying WD40 isn’t an effective way to clean the brake pads of your bike, you should also learn how to clean them properly. The first thing to do is to check whether the brake pads still have any remaining braking surface.
If not, remove the pads from the brake caliper. This gives you two choices – to replace the brake pads with new ones or try cleaning them first. Since the first option is self-explanatory, let’s discuss the second choice. Here are some helpful pointers for this step:
- First, dismount the caliper, then take the brake pads out. Wash your hands before you do this. In many cases, replacing pads with soiled hands makes them even more difficult to clean. Although washing your hands ensures the cleanliness of your brake pads, the best way to handle the pads is with gloves.
- Clean the brake pads’ surface layers by using a rag dampened with alcohol. After doing this, you can start the process of deep cleaning.
- Use a fine grain piece of sandpaper to rub the pads’ surfaces. Make sure you do this uniformly. After finishing the dirty layer, wipe the pads again to remove any dust caused by sanding.
- Drying time comes next. With the cloth soaked with alcohol, you can bring a source of heat like a lighter to it – to evaporate any excess alcohol. This opens the pores of the brake pads.
- Finally, you can clean the pads with a degreaser, rinse, and dry.
Before you start reassembling the clamps and brake pads, make sure that all of the parts are completely dry and clean. Then you can conduct a test to check the success of your operation. After mounting the brake pads, it’s recommended to do a couple of dry brakings. Expect to hear some squeaking sounds at first as the pads adjust.
Conclusion
As a cyclist, it is very important to perform regular maintenance work on your bike and part of this is the checking of brakes pads. When cleaning your bike’s brake pads, never use WD40. Instead, follow the steps we shared. These will help you do the job well without any issues.

Can I Ride a Fat Bike on the Road?
But can you use a fat bike on the road as well? Here’s the answer.
If you’re interested in getting a fat bike, you’ll feel glad to know that they offer more than meets the eye. As a cyclist, taking a closer look at these bikes helps you discover that they are very versatile and they offer a soft, enjoyable riding experience. This makes fat bikes the best all-around bicycle for your needs.
What is a fat bike?
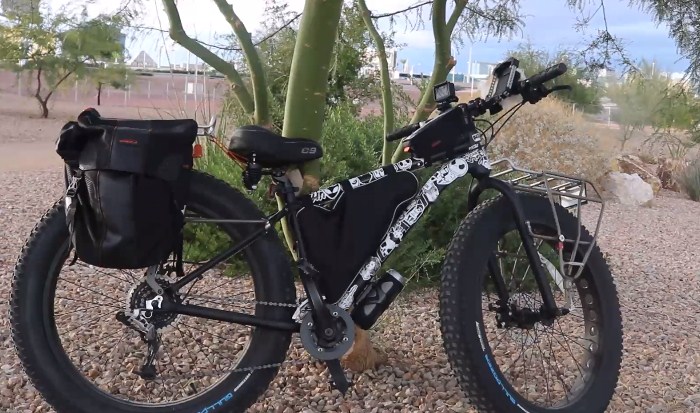
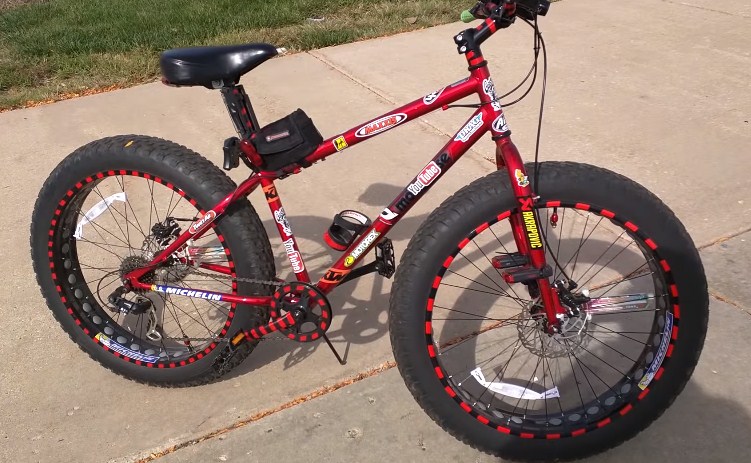
As the name suggests, fat bikes are exactly what they are – a bike with fat tires. The first glance of this can often feel astonishing as they have the appearance of an enlarged kid’s bike to allow for adult use. Another way of describing it is like a bike with tires made of huge, black-colored marshmallows.
Despite their unconventional appearance, fat bikes are here to stay. These bikes have been around for about ten years and since they came out, their popularity has been steadily increasing.
What makes fat bikes so great?
There are several great advantages with fat-tire bikes and these have contributed to their popularity. Perhaps the most obvious of these is its versatility in handling different kinds of terrain. The bike performs well in winter weather when the roads are completely paved with snow.
Aside from this, fat bikes also perform easily in mud, mountain trails, and sand. Versatility is the name of the game for this bike as it can travel on any terrain and condition – through snow, rain, ice, obstacles, rough trails, mud, and bogs. The fat tires can handle all of these challenges.
Another great advantage is that fat bikes offer a comfortable ride. Even when taken through rough terrains, it feels like a dream. It’s like a combination of a tank’s traction and a pillow’s comfort. This is because of the soft tires absorb virtually all of the bumps on the road, thus, leaving you with a riding experience that’s insanely smooth.
When riding on rough trails, the bike can also increase your skill capacity. Many bikers can’t handle challenging trails because, with traditional cycling, any obstacle or rock can throw them off their bikes. This, in turn, may lead to possible injuries and disasters.
But with the traction afforded by fat-tire bikes, you won’t have to worry about challenging trails, unseen rocks or obstacles that can throw you off your bike’s frame as the tires can effortlessly glide over these issues.
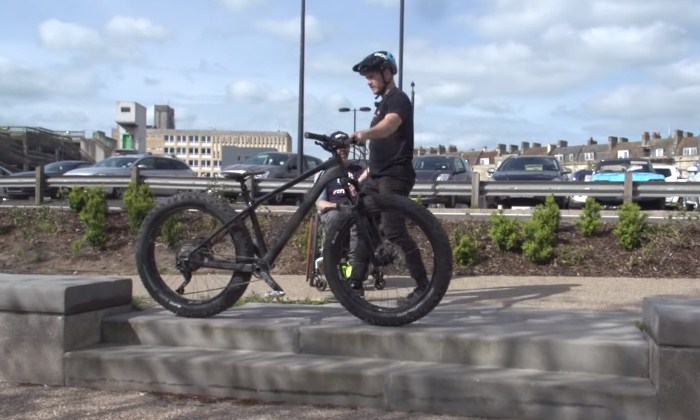
Can you ride your fat bike on the road?
If you can use a fat bike on rough conditions and terrains, of course, you can also ride this bike on roads, although it won’t perform as well as bikes designed specifically for such surfaces. Surprisingly, a lot of cyclists find it easier to hop on their fat bike and ride around their neighborhood comfortably.
One primary reason why fat bikes have become more popular for pavement use is that for some owners, it’s the only bike they have. Rather than investing in a bicycle that can handle only one or two types of terrains, they’d rather have one that can perform on all types. Again, versatility comes into play.
While you can ride your fat bike on the road during sunny days in summer, you can also use the same bike when the snow falls on the streets. If you have the money to invest in several kinds of bikes for various terrains, that’s fine. But if one fat bike can handle all these types of terrain, why spend more?
Fat bikes are very practical, especially when you’re not sure what to expect when your journey starts in the morning. It may be very bright and sunny in the morning only to start raining late in the day. The fat bike can easily handle these changes in weather conditions.
With a fat bike, you’re guaranteed that you won’t miss a step on your way back home. For instance, you can have a snowstorm happening in the middle of winter. No one in their right mind would dare navigate snowy roads with a mountain bike – but with a fat bike, it’s no problem at all.
It won’t be as fast as other types of bikes on the road
While you can ride a fat bike on the road, it won’t perform as well as a skinny-tire bike with high air pressure, specifically on clean surfaces with ideal weather conditions. The reason, of course, is that fat bike tires are significantly heavier and wider.
Moreover, the bike itself isn’t specifically designed for speed. Using an analogy, you can compare the fat bike to a jeep that you can use to ride over different terrains whereas a road bike is a race car that’s only meant for smooth pavements.
Since the tires of fat bikes are a lot heavier and wider too, they have a stronger grip on the road, thus, causing more rolling resistance and friction. If you’re an experienced fat bike rider, you may have the ability to keep up with a beginner cyclist on a road bike, but not if you have equal skill levels.
For a fat bike, it’s just too much of a difference to overcome. If you want frequently ride on pavements and you need speed, you have the option to switch from fat-tire bike to something designed for this task.
Some bikers would buy an inexpensive mountain bike to use for the summer months then go back to your fat bike for the winter. This may not be very convenient for many but it’s a little less expensive than investing in a high-priced bike.
The bottom line
Now that the fat bikes are more popular than ever, the advancements in their technology have made them even more accessible. As the tires on these bikes get wider, the frames are also getting lighter rather than gaining more weight along with the growing tire size. Because of their growing popularity, you can now see fat bikes online and in bike shops.
Manufacturers are now more determined to mass-produce them as the profitability factor is enough to make them invest in the infrastructure. As a consequence, the prices for the fat-tire bikes have dramatically decreased. Now that you know that a fat bike can get you anywhere – on any terrain and in any weather condition – perhaps it’s time to invest in one.